
Understanding the ‘Triggered Data’ Option.
Debugging email-related issues can be complex and time-consuming for developers and IT professionals due to various factors like network configurations, server settings, authentication mechanisms, and the email-sending code logic. However, the ‘Triggered Data‘ option offers a powerful solution by enabling precise identification of the code involved in email transmission.

The ‘Triggered Data‘ option provides detailed insights into the email-sending process. By enabling this feature, developers can capture and examine the specific code that triggers an email, which is especially useful in scenarios where emails are generated dynamically based on user interactions, scheduled tasks, or other automated processes. This ability to pinpoint the exact code responsible for sending emails can significantly reduce the time and effort required to diagnose and resolve issues.
In this tutorial we will see how to use this option.
Step 1: First, install the plugin from here https://wordpress.org/plugins/check-email/ or go to add the plugin and search for “Check & Log Email by checkmail“. Download the plugin and install it.
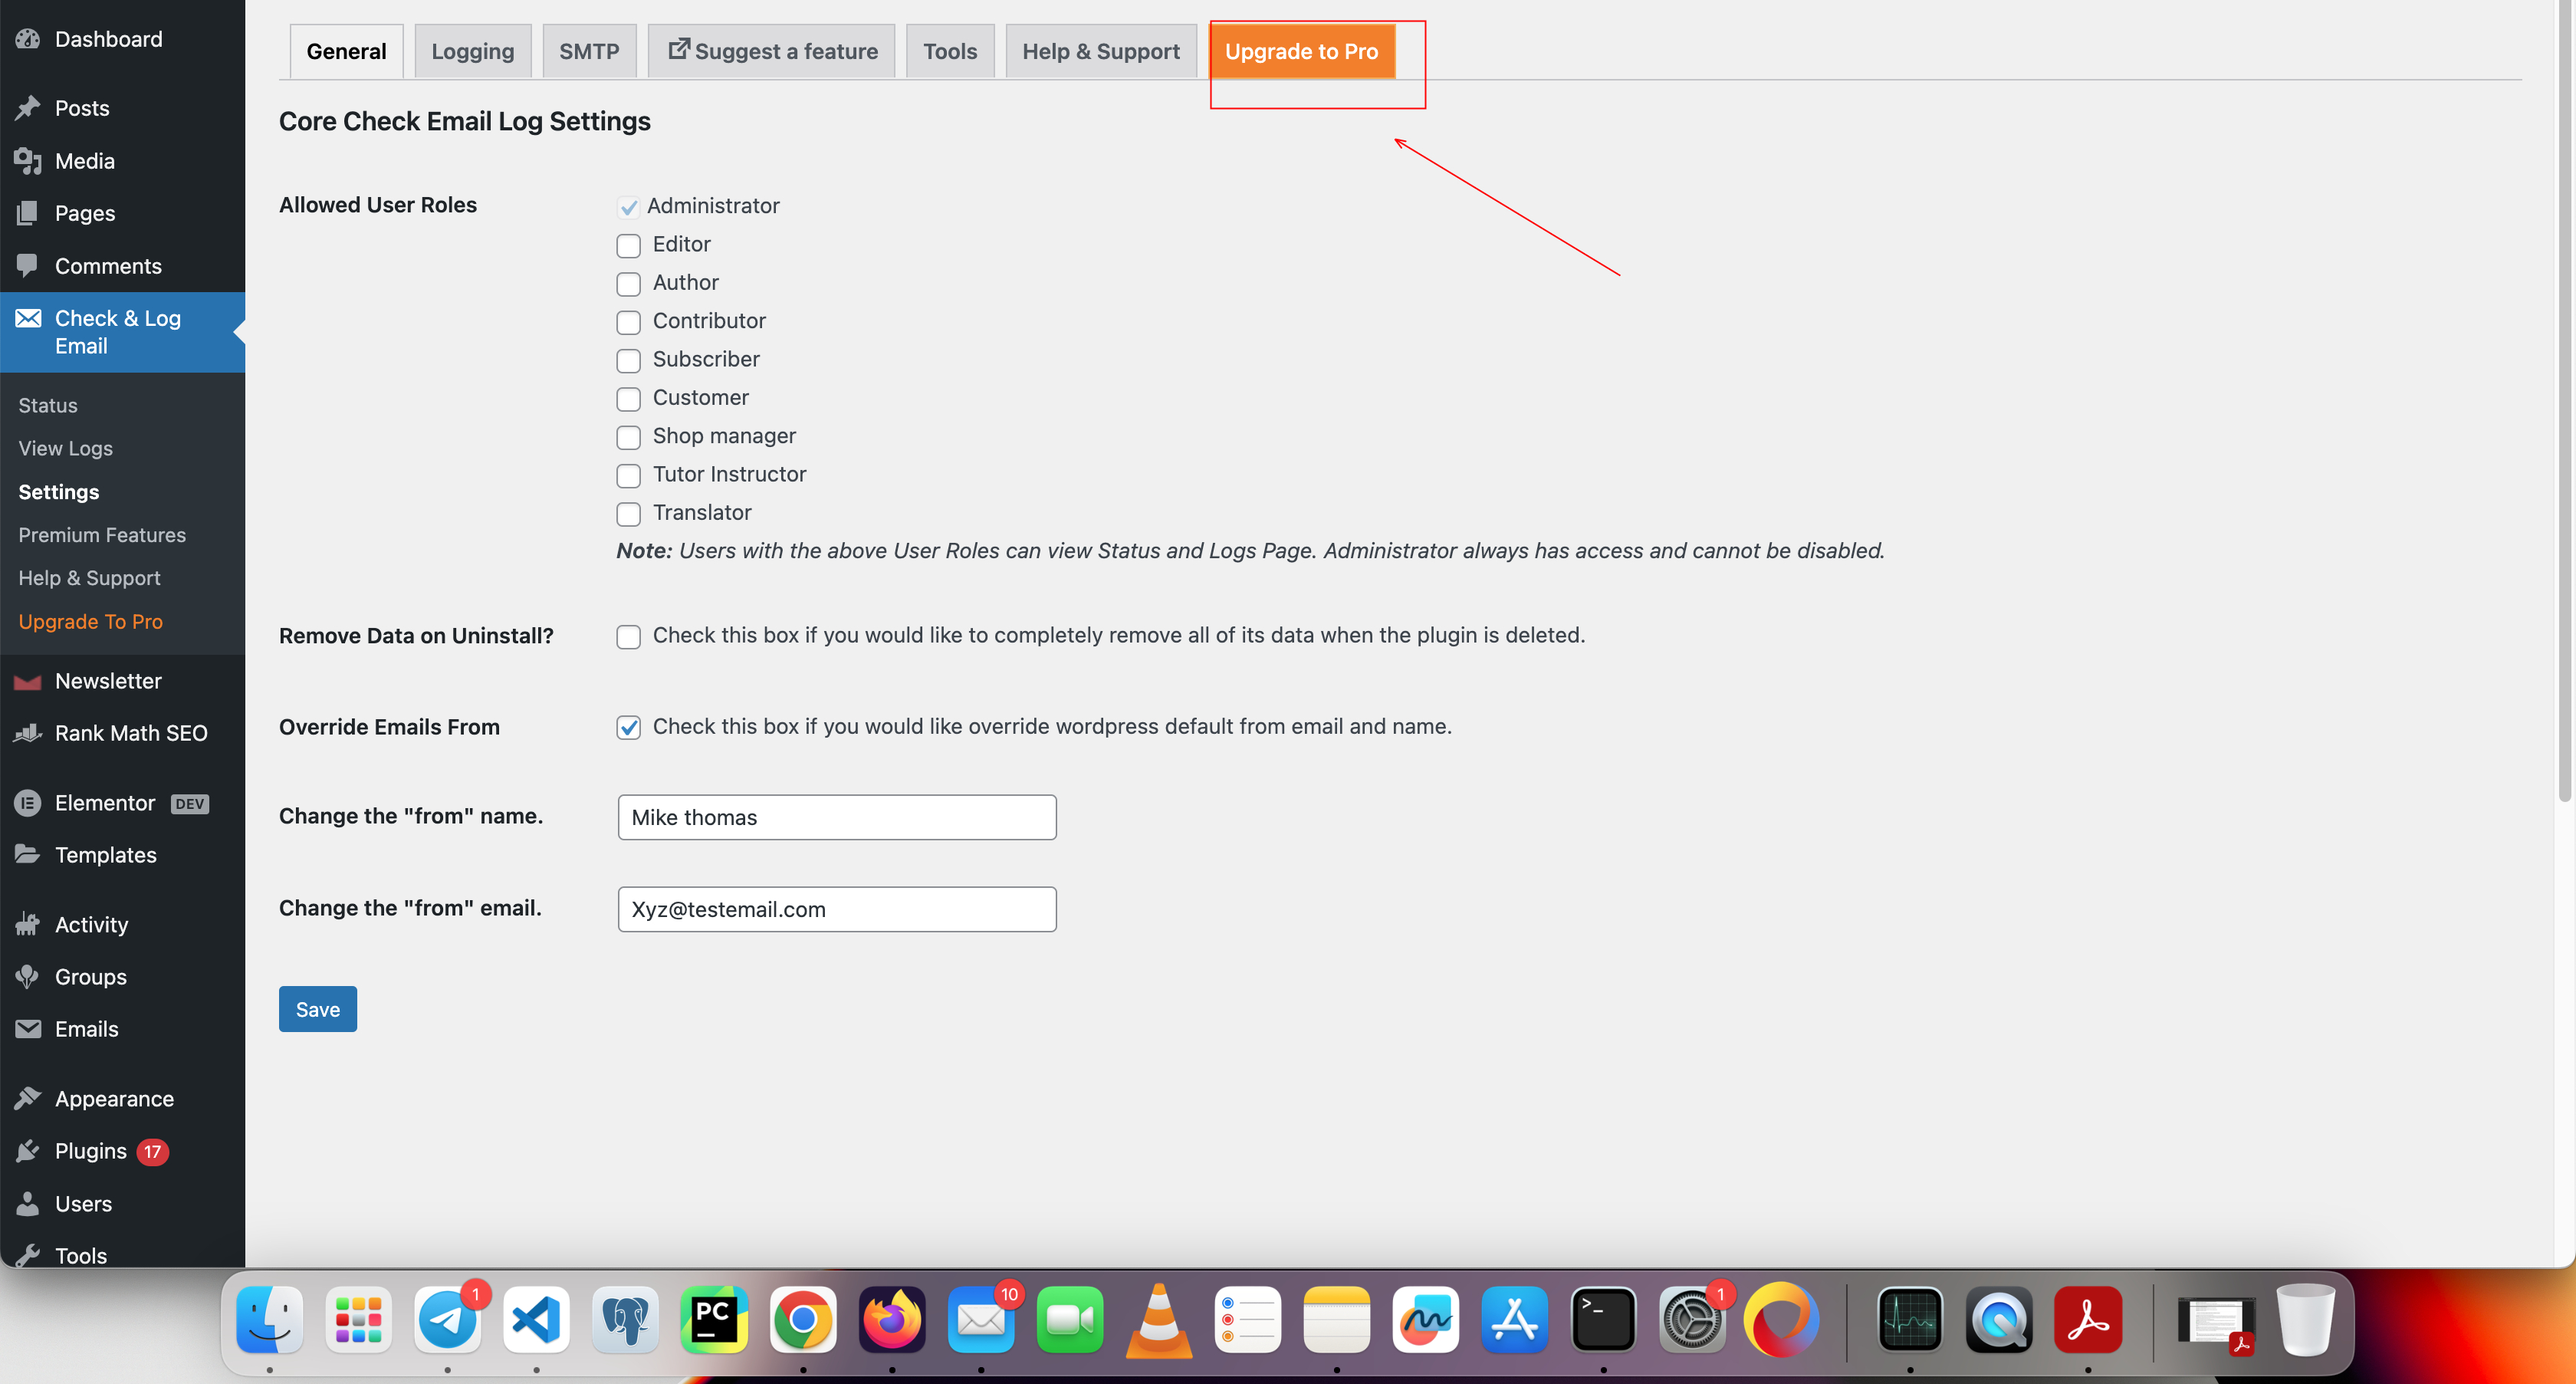
Step 2: To get the “Triggered Data” option, kindly click on “Upgrade to Pro” or visit this link and create an account. Once you have created an account, you will get the option to download the Pro zip file. Download and install it on WordPress.
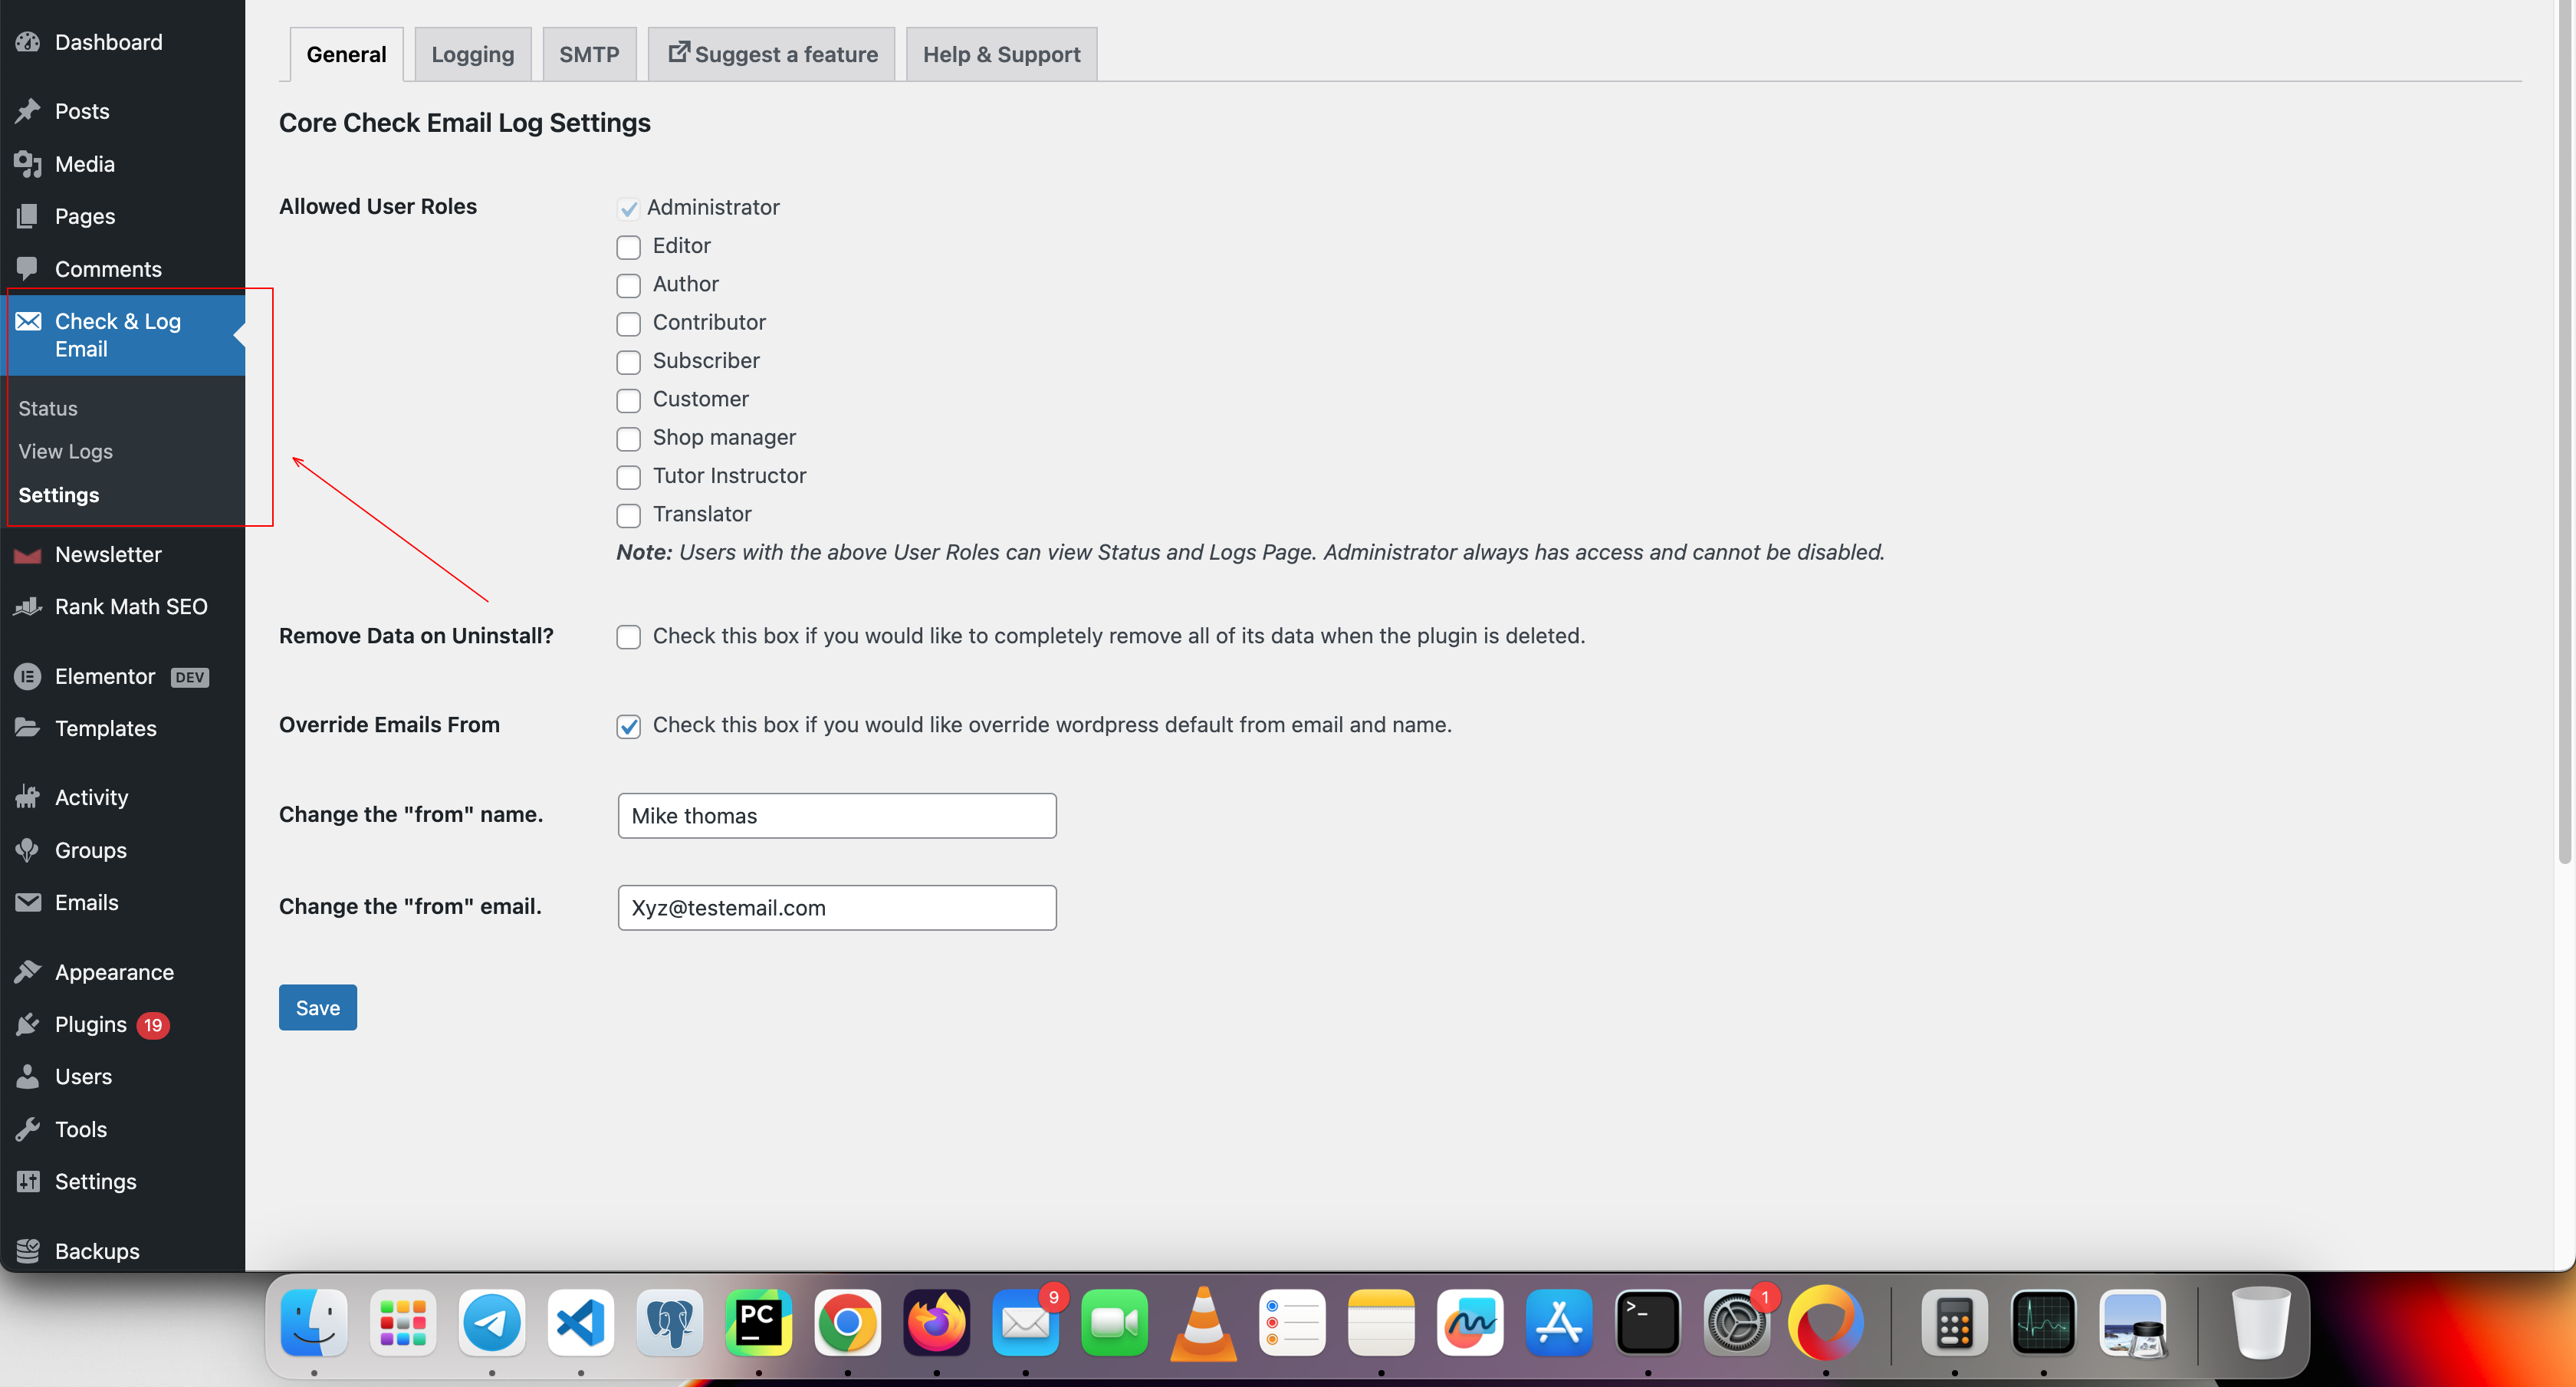
Step 3: Once you have finished downloading, please ensure that the plugin is active on your end. It will be reflected on WordPress like this.
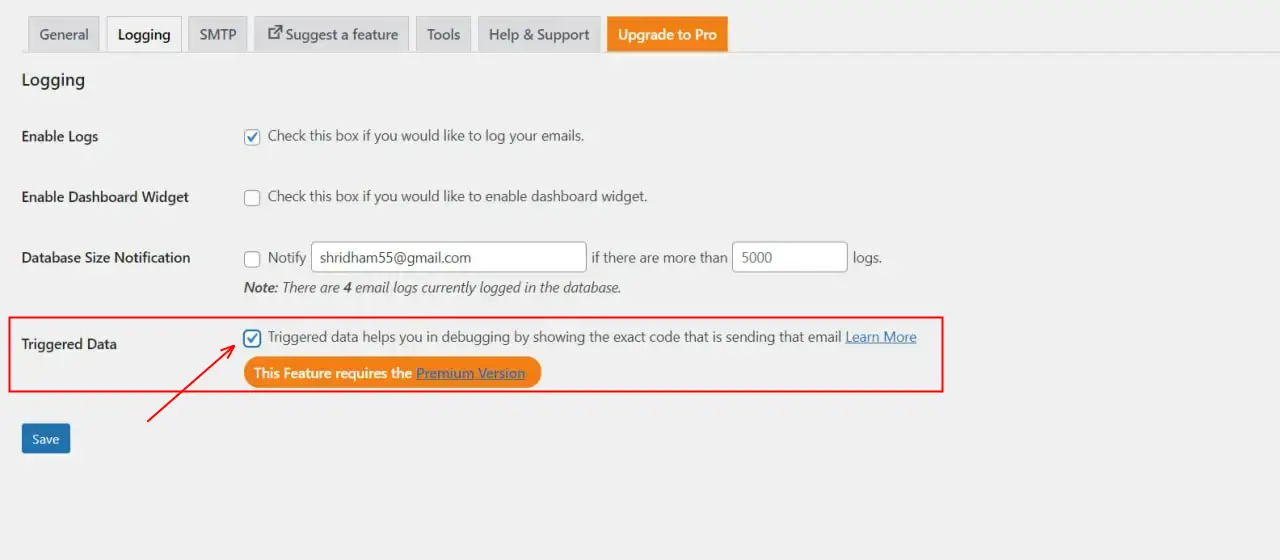
Step 4: Click on the Logging tab, where you’ll find a Dashboard with the “Triggered Data” option. Please check that option and click save.
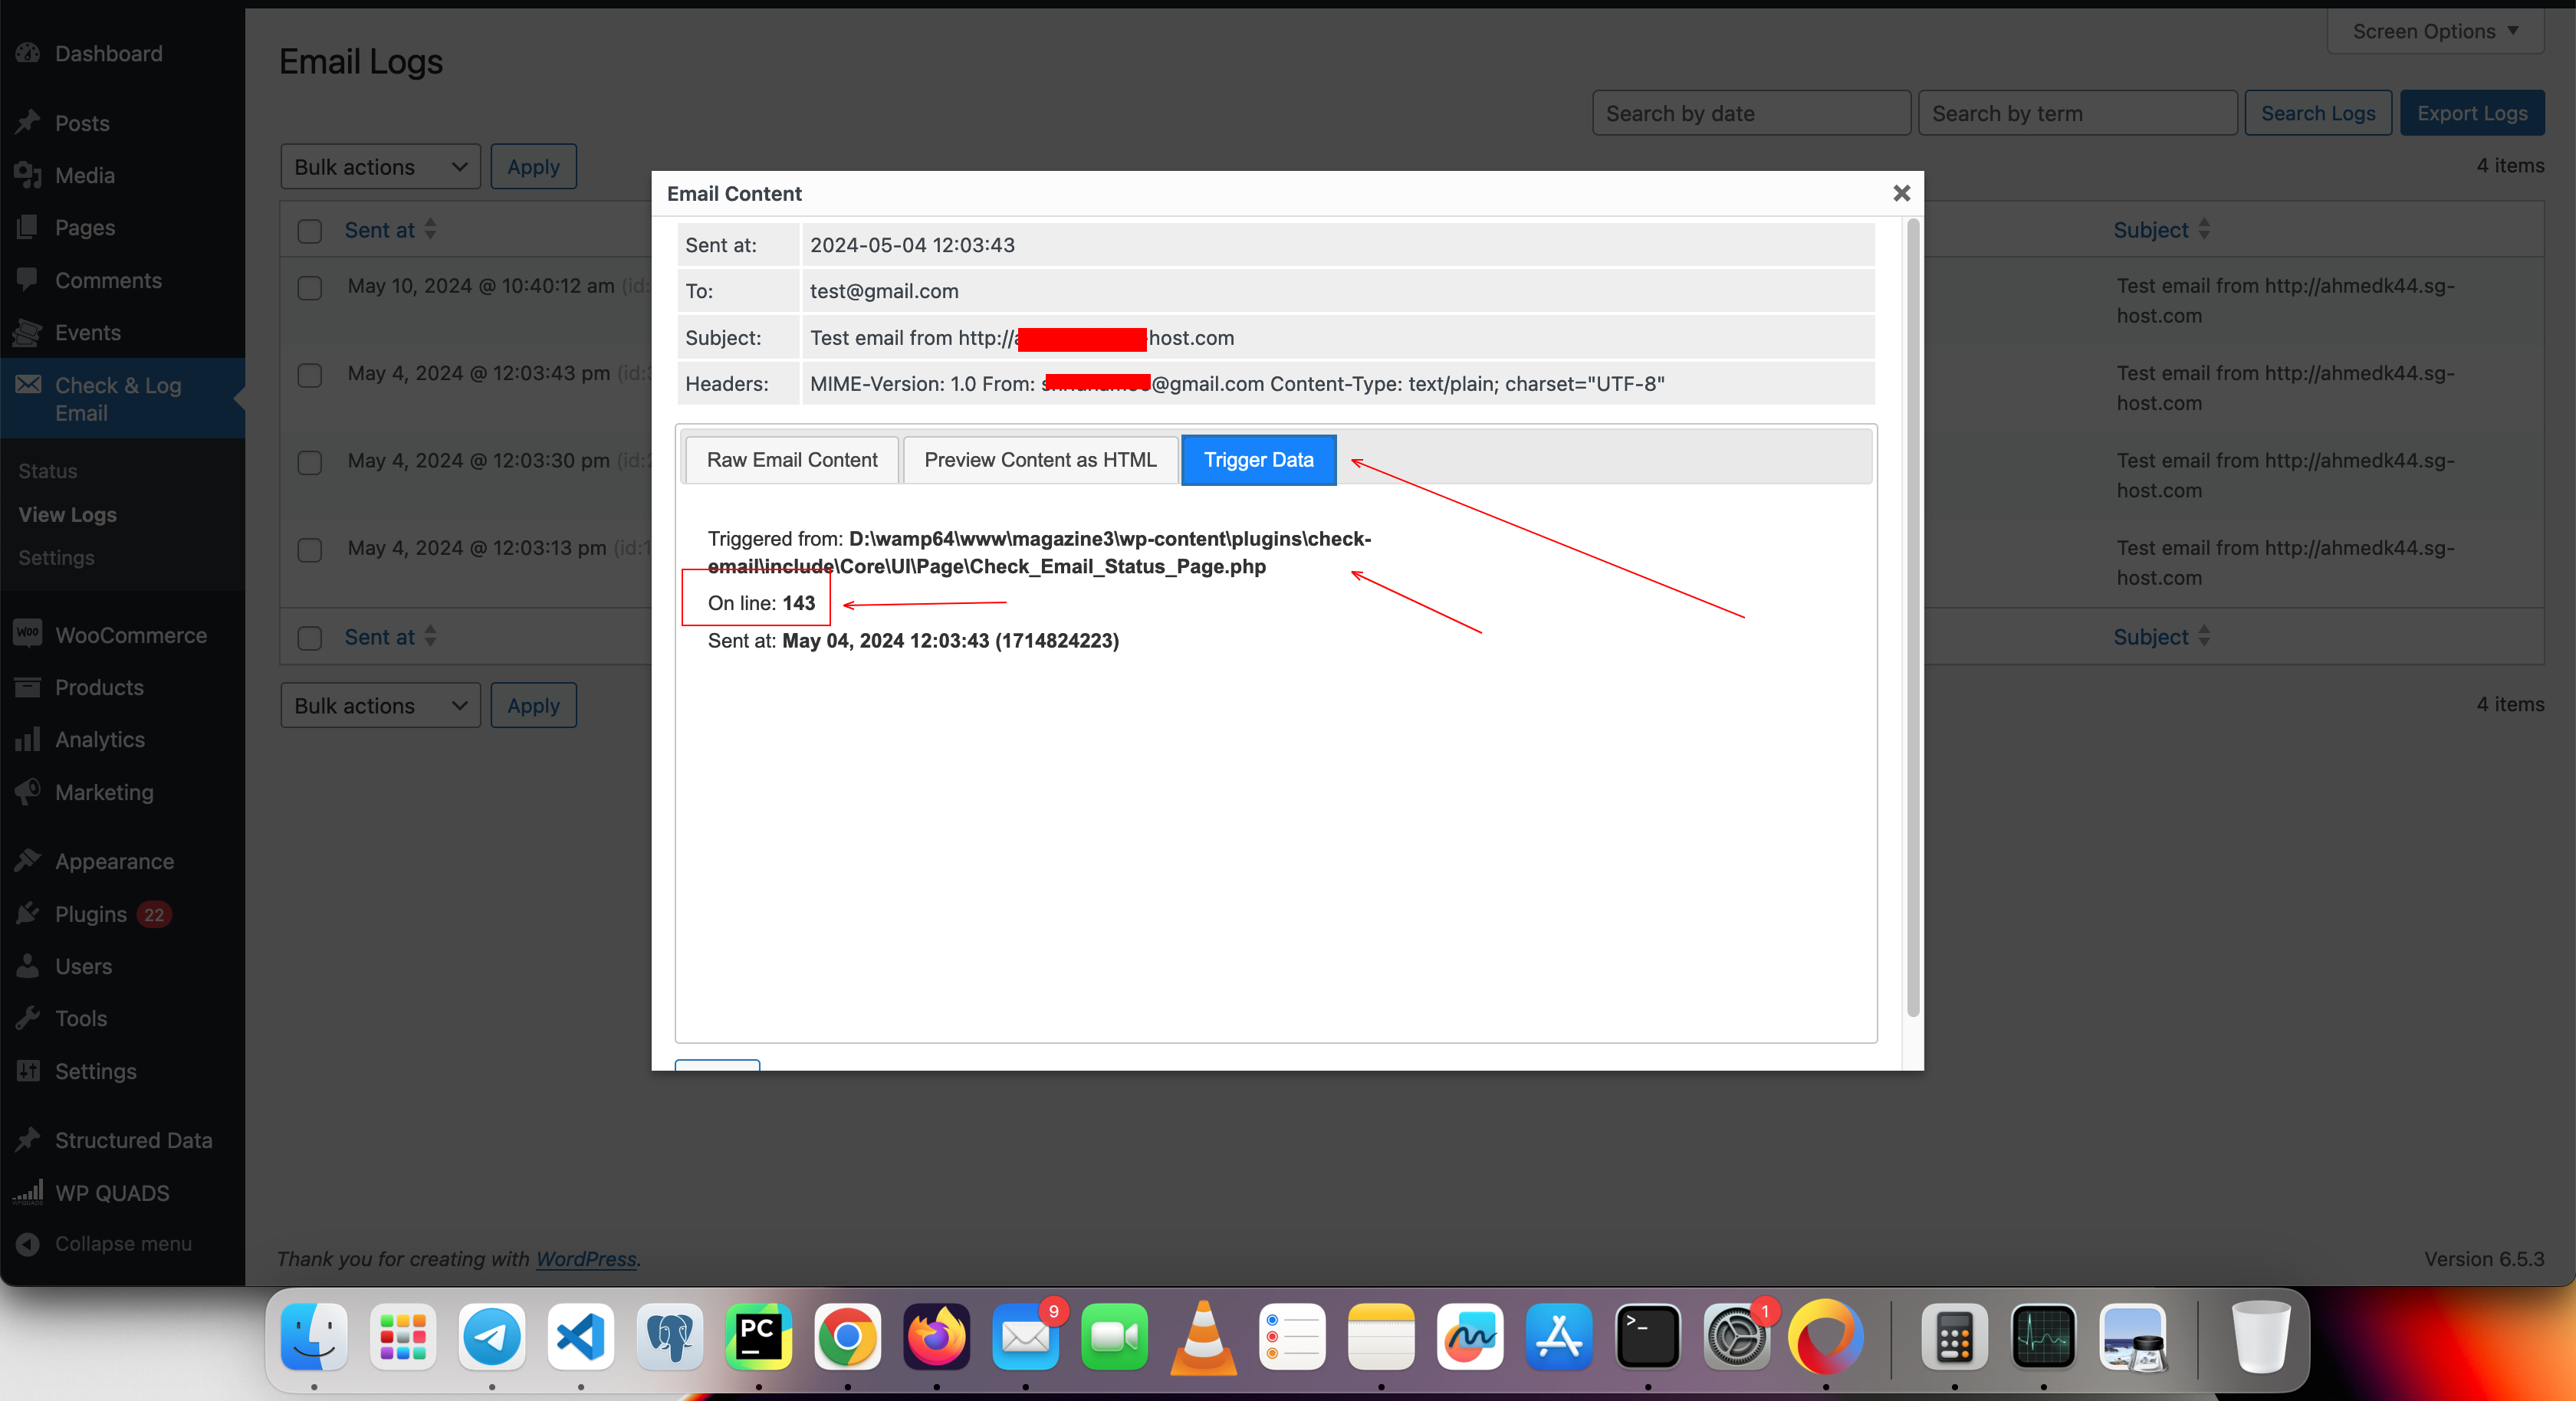
Step 5: Once you have completed everything, click on “View Logs” and then expand the “View content” option by clicking on it.
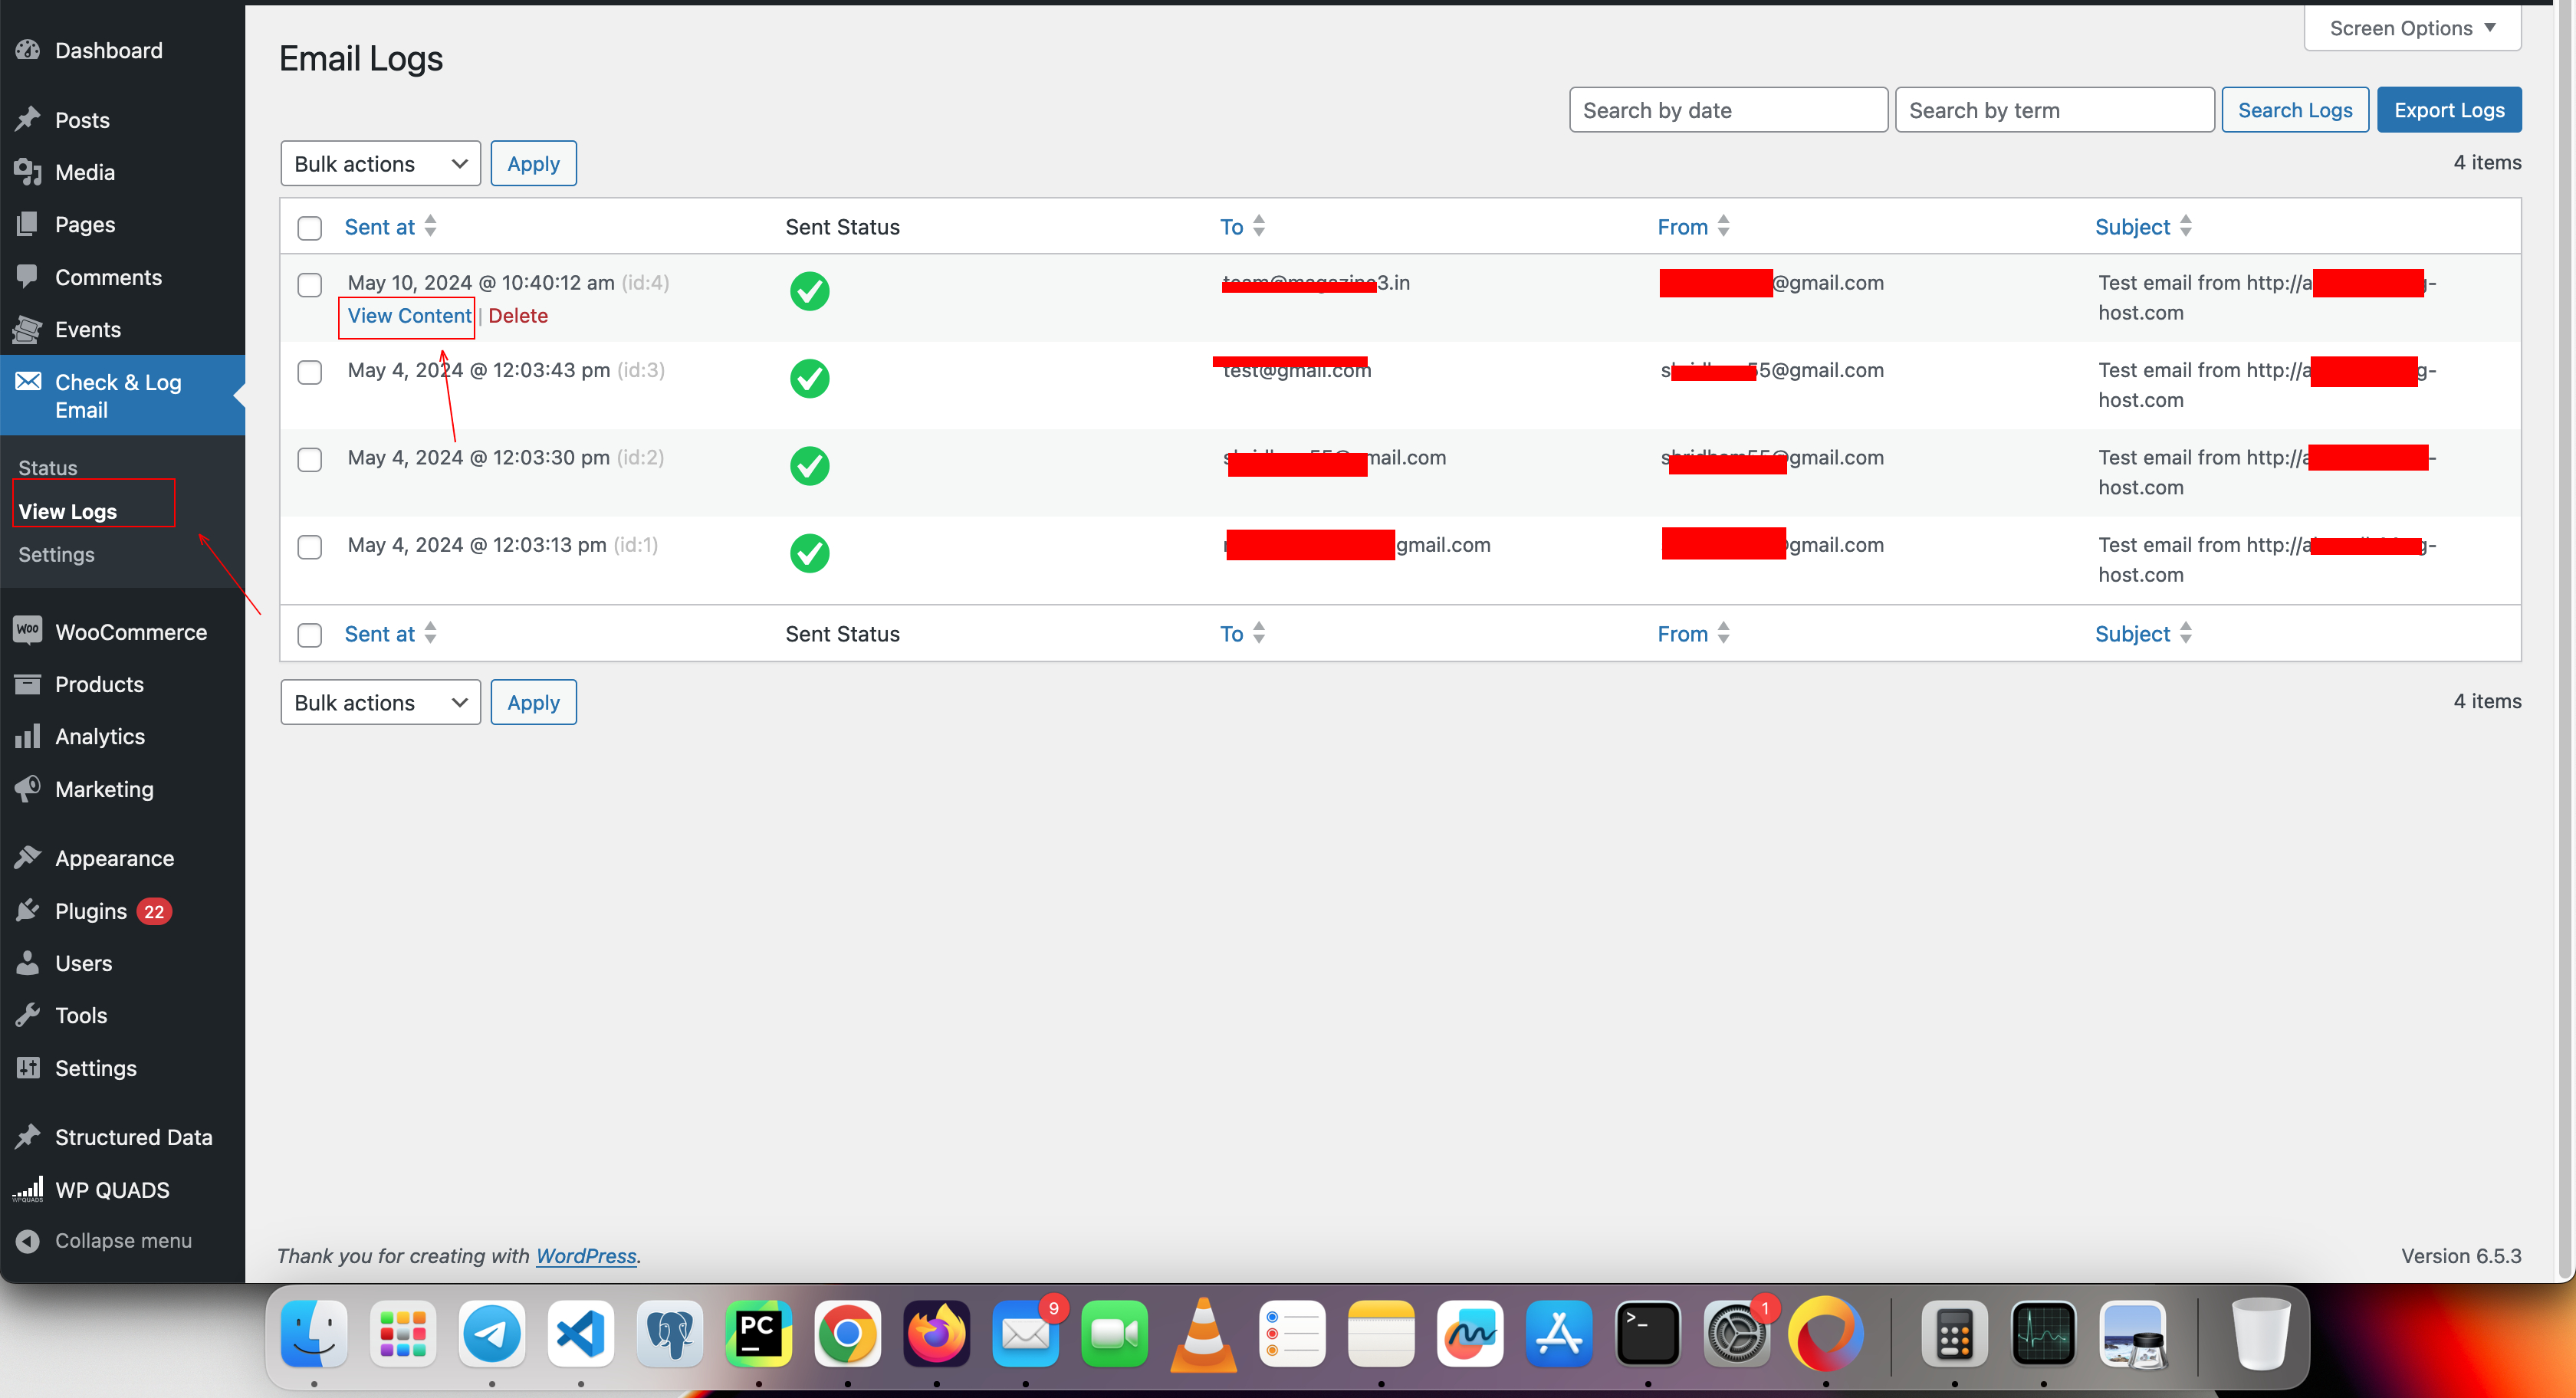
You will see a window displaying parameters such as “Triggered from:“, “On line:“, and “Sent at:“. These parameters provide valuable information about the line where the code was triggered, the line from which the email was sent, and the timestamp. This information is invaluable for developers and IT professionals in debugging the issue.
Conclusion and Best Practices for Maximizing the ‘Triggered Data’ Option.
The ‘Triggered Data‘ option serves as a valuable asset in the arsenal of tools available for debugging email-related issues. By following the outlined steps and best practices, Developers and IT professionals can harness the power of the ‘Triggered Data‘ option to efficiently identify the exact code responsible for email transmission. This streamlines the debugging process and ensures the smooth operation of email communications.
- Regularly employ the ‘Triggered Data‘ option throughout the development and testing phases to proactively detect and resolve potential email-related issues.
- Document the insights derived from the ‘Triggered Data’ output to establish a knowledge base for troubleshooting similar issues in the future.
- Collaborate with team members to efficiently utilize the ‘Triggered Data‘ option and exchange valuable insights for collective learning.
FAQ’s
- What is the ‘Triggered Data’ option in email debugging?
- The ‘Triggered Data’ option helps identify the exact data and code responsible for sending an email. It provides insights into variables, conditions, and triggers that initiated the email dispatch.
- How does ‘Triggered Data’ help in debugging email issues?
- By analyzing the triggered data, developers can pinpoint errors such as missing variables, incorrect conditions, or unexpected email triggers. This helps in diagnosing and fixing email delivery issues efficiently.
- How do I interpret the ‘Triggered Data’ logs?
- Look for key parameters such as recipient details, trigger conditions, timestamps, and variables. Compare them with expected values to identify discrepancies.
- How do I fix an email issue once I identify the problem in ‘Triggered Data’?
- Correct any missing or incorrect variables.
- Adjust trigger conditions if they are misconfigured.
- Check if automation rules are correctly set up.
- Test by manually triggering emails and verifying logs.
That’s it for this tutorial, Need more help? kindly fill the below form 👇